Thanks mate, yeah im going to do everything properly on this build I don't know why people would want to cut corners. Do it properly the first time. The poor man always pays twice ( not saying im rich far from it that's why my project is taking a while haha). I have looked at the strengthening section a few times. Im not going to seam weld but I am installing the front a pillar section and the rear bracing between the rear strut towers, just waiting till I buy a after market fuel tank and get it mounted at the same time when the sills get replaced etc. ill be getting the wheel well removed too and will be getting a recess for the fuel tank to sit in.
So I have done a few more things.
- Fitted the datsport steering box brace
- Drilled the hole for the plms loom
- Drilled the holes for the datsport sr20 fitting kit crush tubes
- Drilled holes In the forward wheel wells and fitted bulk head fittings for the brake lines to go through
- Fitted the datsport brake booster in preparation for making brake lines
- I have been mucking around with the wilwood brake bias valve. I like where its mounted but I am trying to work out how best to move it of the inner guard for easier access to adjust it
- Painted the SSS dash surround ( still needs a touch up where it meets the chrome. ill need fine line tape)
- Bent up the stainless 1/2" fuel lines. The first one I made a bend in the wrong direction

the second one turned out great
- Made mock up cupboard catch can and window washer bottle. ( if anyone has any other ideas for this please let me know

)
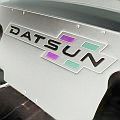
69 SSS dash surround painted
Attachment:
![[ attachment ]](./download/file.php?id=30397&t=1&sid=9de5ad24b3c9099edcdf2eee657516b9)
IMG_5359.JPG [ 1.77 MiB | Viewed 4930 times ]
steering box brace, bias valve, crush tube holes, brake booster, washer bottle mock up and bulkhead fitting
Attachment:
![[ attachment ]](./download/file.php?id=30395&t=1&sid=9de5ad24b3c9099edcdf2eee657516b9)
IMG_5965.JPG [ 1.58 MiB | Viewed 4930 times ]
plms loom and catch can mock up
Attachment:
![[ attachment ]](./download/file.php?id=30396&t=1&sid=9de5ad24b3c9099edcdf2eee657516b9)
IMG_5966.JPG [ 1.56 MiB | Viewed 4930 times ]
Im also looking into a brake booster brace. I have found one in the USA but its for left hand drive and no hope of them making a righthand drive

does anybody have any leads? failing that I may have to make one
https://technotoytuning.com/nissan/510/ ... datsun-510
Cheers,
Richard
![[ img ]](http://s1121.photobucket.com/user/butch510/media/IMG_4624.jpg.html)
![[ img ]](http://s1121.photobucket.com/user/butch510/media/IMG_4798.jpg.html)
![[ img ]](http://s1121.photobucket.com/user/butch510/media/IMG_4811.jpg.html)
![[ img ]](http://s1121.photobucket.com/user/butch510/media/IMG_4828.jpg.html)
![[ img ]](http://s1121.photobucket.com/user/butch510/media/IMG_4818.jpg.html)
![[ img ]](http://s1121.photobucket.com/user/butch510/media/IMG_4706.jpg.html)
![[ img ]](http://i1121.photobucket.com/albums/l509/butch510/IMG_4836.jpg)
![[ img ]](http://i1121.photobucket.com/albums/l509/butch510/IMG_4846.jpg)
![[ img ]](http://i1121.photobucket.com/albums/l509/butch510/510em11a.jpg)
![[ img ]](http://i1121.photobucket.com/albums/l509/butch510/IMG_5229.jpg)
![[ img ]](http://i1121.photobucket.com/albums/l509/butch510/IMG_5045.jpg)
![[ img ]](http://i1121.photobucket.com/albums/l509/butch510/IMG_5586.jpg)
![[ img ]](http://i1121.photobucket.com/albums/l509/butch510/IMG_5561.png)
![[ img ]](http://i1121.photobucket.com/albums/l509/butch510/IMG_5505.png)
![[ img ]](http://i1121.photobucket.com/albums/l509/butch510/IMG_5508.png)
![[ img ]](http://i1121.photobucket.com/albums/l509/butch510/srmrenforcerintake.jpg)
![[ img ]](http://i1121.photobucket.com/albums/l509/butch510/IMG_5957.jpg)
![[ img ]](http://i1121.photobucket.com/albums/l509/butch510/wheels2.jpg)
![[ img ]](http://i1121.photobucket.com/albums/l509/butch510/wheels.jpg)
![[ img ]](http://i1121.photobucket.com/albums/l509/butch510/IMG_5588.jpg)
![[ img ]](http://i1121.photobucket.com/albums/l509/butch510/IMG_5612.jpg)
![[ img ]](http://i1121.photobucket.com/albums/l509/butch510/1491650_616767248411115_7151500852687303530_n.jpg)
![[ img ]](http://i1121.photobucket.com/albums/l509/butch510/10271470_616767311744442_8575891882287020575_n.jpg)
![[ img ]](http://i1121.photobucket.com/albums/l509/butch510/10178094_616767061744467_3938464039828989545_n.jpg)
![[ img ]](http://i1121.photobucket.com/albums/l509/butch510/10171851_616767038411136_5362251876045610010_n-1.jpg)
![[ img ]](http://i1121.photobucket.com/albums/l509/butch510/10246330_616767078411132_5835356012861477916_n.jpg)
![[ img ]](http://i1121.photobucket.com/albums/l509/butch510/1800392_616767081744465_7123985034231696616_n.jpg)
![[ img ]](http://i1121.photobucket.com/albums/l509/butch510/10255281_616767518411088_7091967961138864621_n.jpg)
![[ img ]](http://i1121.photobucket.com/albums/l509/butch510/10252008_616767711744402_8943493842770340081_n.jpg)
![[ img ]](http://i1121.photobucket.com/albums/l509/butch510/10007476_616767828411057_8196175014169544984_n.jpg)
![[ img ]](http://i1121.photobucket.com/albums/l509/butch510/1517634_616767331744440_8718272049729477301_n.jpg)
![[ img ]](http://i1121.photobucket.com/albums/l509/butch510/603680_616767618411078_8693883081283673767_n.jpg)
![[ img ]](http://i1121.photobucket.com/albums/l509/butch510/10312472_616767341744439_4444949614460110639_n.jpg)
![[ img ]](http://i1121.photobucket.com/albums/l509/butch510/10275953_616767131744460_94201774828299926_n.jpg)
![[ img ]](http://i1121.photobucket.com/albums/l509/butch510/10252178_616767168411123_4543058610470376099_n.jpg)
![[ img ]](http://i1121.photobucket.com/albums/l509/butch510/10001495_616767395077767_2648315976230254966_n.jpg)
![[ img ]](http://i1121.photobucket.com/albums/l509/butch510/1975268_616767781744395_4123225558259128210_n.jpg)
![[ img ]](http://i1121.photobucket.com/albums/l509/butch510/1797458_616767761744397_6958273500116235553_n.jpg)
![[ img ]](http://i1121.photobucket.com/albums/l509/butch510/10308141_616767905077716_6411965787829432937_n.jpg)
![[ img ]](http://i1121.photobucket.com/albums/l509/butch510/10268422_616767925077714_7206433941050191924_n.jpg)
![[ img ]](http://i1121.photobucket.com/albums/l509/butch510/10299082_616767601744413_582487843214833797_n.jpg)
![[ img ]](http://i1121.photobucket.com/albums/l509/butch510/10153127_616767958411044_8407207667355088885_n.jpg)
![[ img ]](http://i1121.photobucket.com/albums/l509/butch510/10308218_616768111744362_3450781848544756624_n.jpg)
![[ img ]](http://i1121.photobucket.com/albums/l509/butch510/10277292_616768198411020_8105733995194331110_n.jpg)
![[ img ]](http://i1121.photobucket.com/albums/l509/butch510/10172869_616768051744368_3154410548902156507_n.jpg)
![[ img ]](http://i1121.photobucket.com/albums/l509/butch510/IMG_5967.jpg)
![[ img ]](http://i1121.photobucket.com/albums/l509/butch510/IMG_5684.jpg)
![[ img ]](http://i1121.photobucket.com/albums/l509/butch510/IMG_4995.jpg)
![[ img ]](http://s1121.photobucket.com/user/butch510/media/IMG_5561.png.html?sort=3&o=8)